How to Connect Live Agent Chat to Service Cloud Console
In this 10-minute guide, we’ll walk through the essential steps to set up Live Agent and integrate it into the Salesforce Service Cloud console. Following these best practices will have your team up and running with integrated chat support in no time.
Before checking out this post check out How to Implement Salesforce Live Agent Chat to get the necessary code.

Connect Live Agent Chat to Service Cloud Console
Total Time: 10 minutes
Configure Chat Agents

Switch to Salesforce Setup.
Search ‘Chat agent configuration’ from the Quick Search box and open the Chat Agent Configurations page.
To create a new configuration, Click the New button.
Chat Agent Configurations
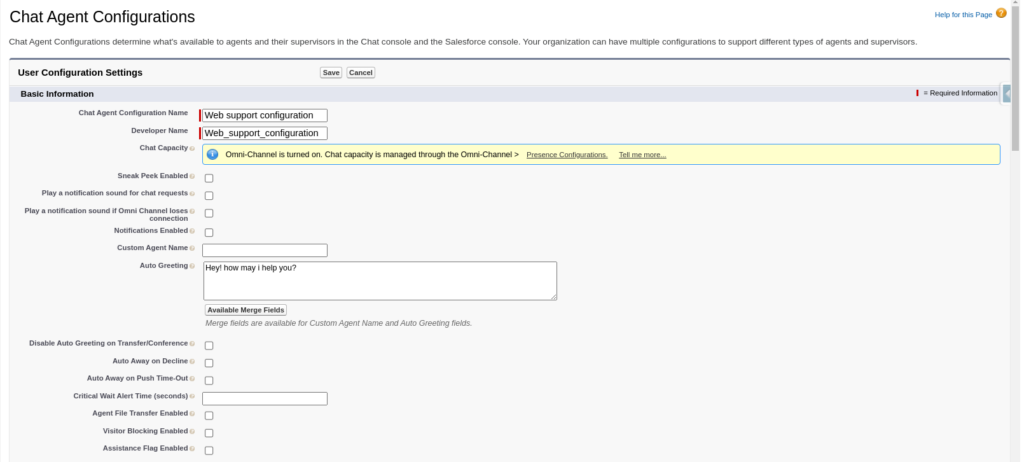
Chat Agent Configurations determine what’s available to agents and their supervisors in the Chat console and the Salesforce console.
Name the configuration.
Complete the Basic Information fields for your chat agents.
Assign Users and Profiles
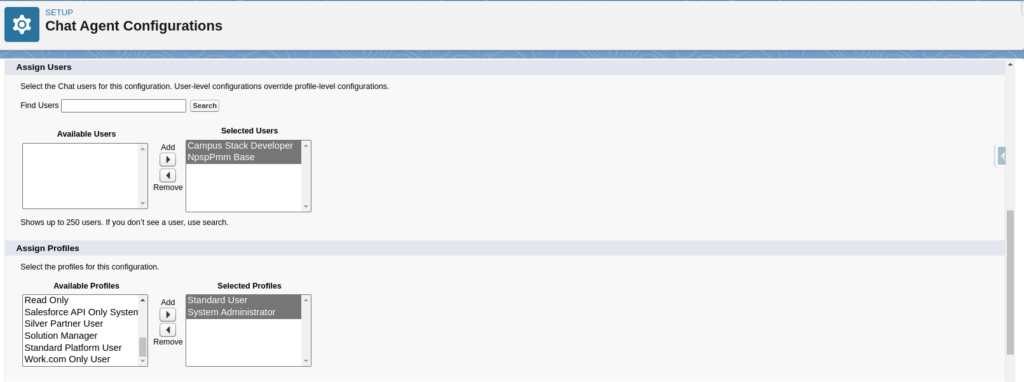
Assign the Users who can access chat channels.
Assign the Profiles with chat permissions.
Add chat agent to service console
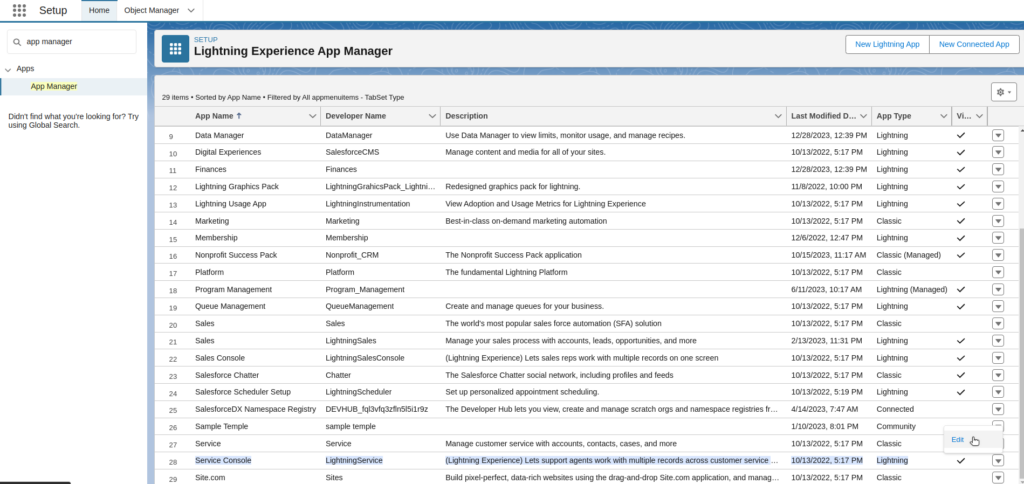
Go to Setup Search ‘App Manager’ from the Quick Search box and edit the Service Console app.
Configure App Setting
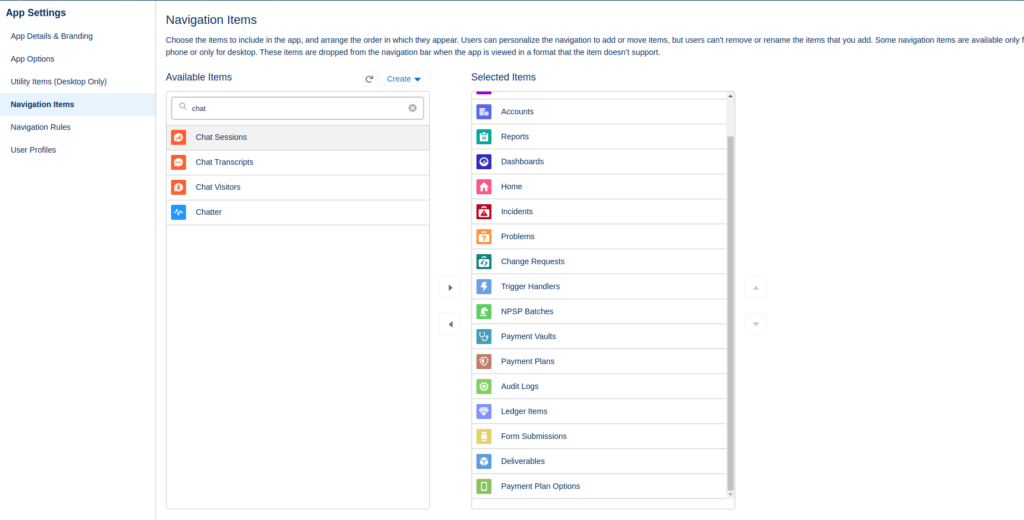
Navigate to Navigation Items.
Search for ‘Chat Session’ and add it to the Service Console navigation.
Access Service Console
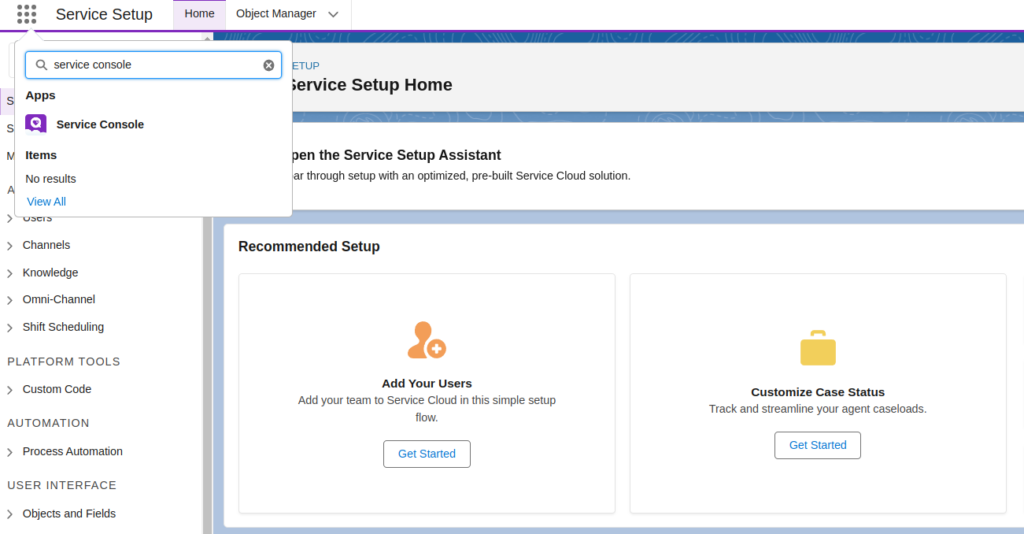
Go to Service Setup and search ‘Service console’ using the Quick Search on the App Launcher.
Click the Service Console app to open it.
Configure Omni-Channel
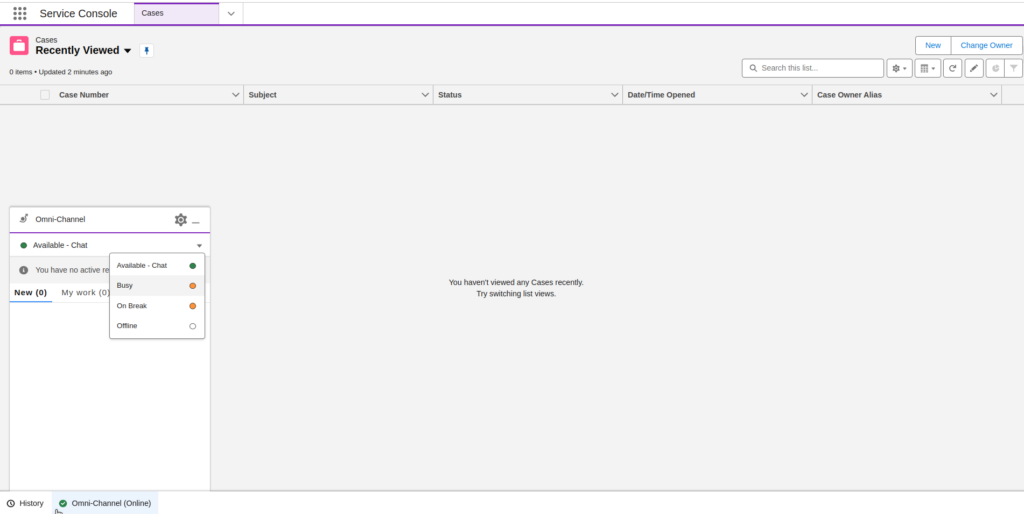
Set Omni-Channel settings offline to available to chat.
Add code snippet on website:
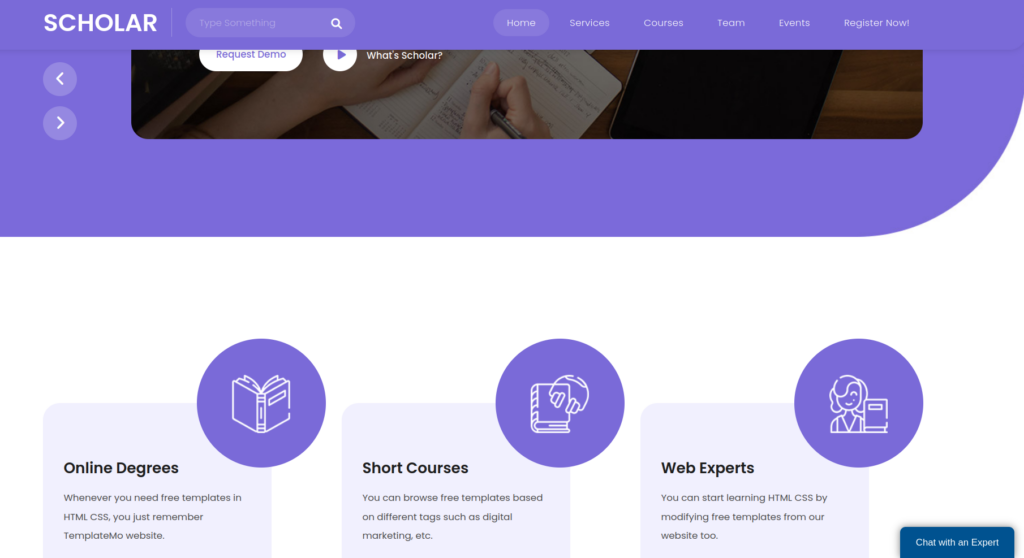
Copy the chat code snippet generated during Live Agent setup.
Paste this code on website pages where you want chat to appear.
Test the Chat
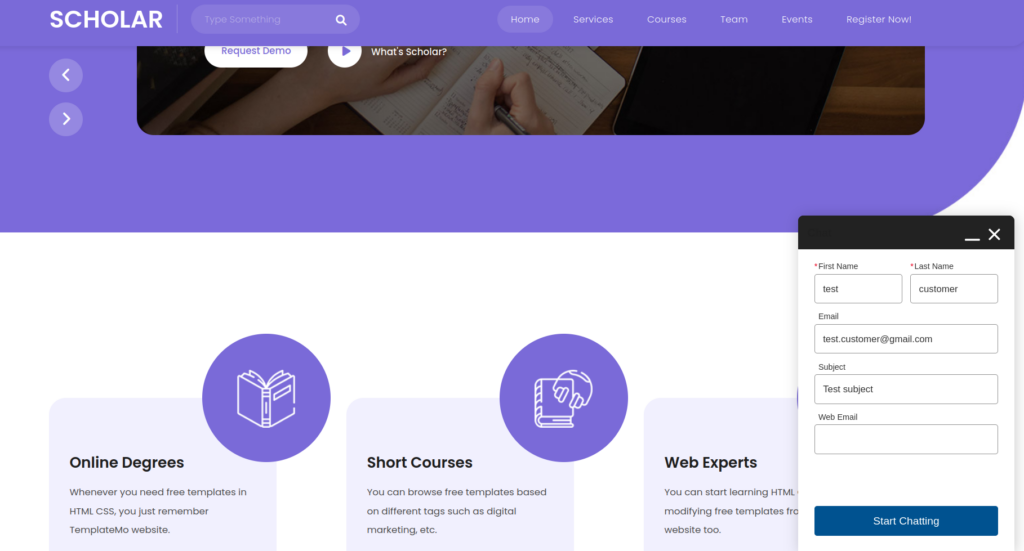
To Initiate Chat with an Agent:
On your site, click the Start Chatting button.
This allows customers to start a chat session.
Submit Chat Request
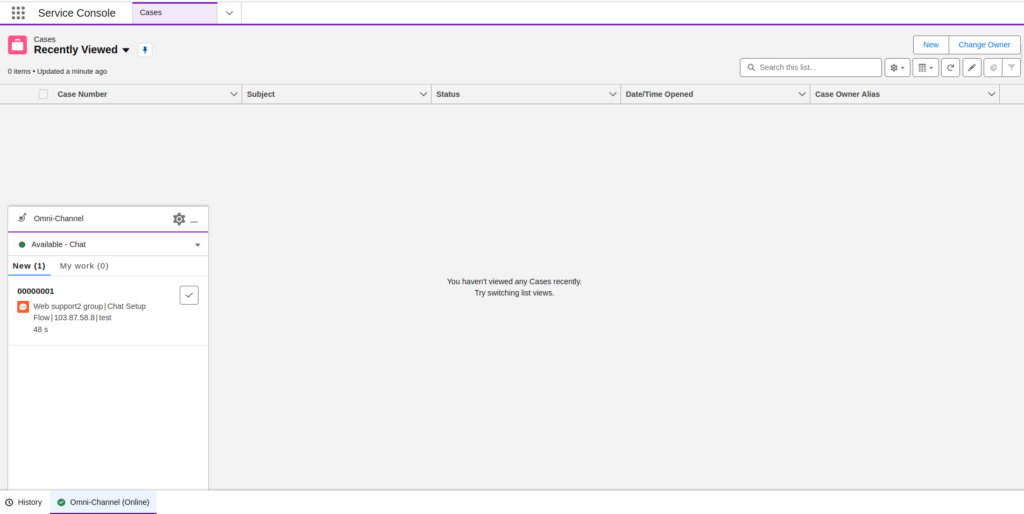
When the customer clicks Start Chatting, this sends a chat request to agents.
Chat With Agent

The chat session is now established between the Customer and Agent in Salesforce.
The agent can view and respond to chats within the Service Console.
Conclusion
By completing the chat agent configuration, user assignments, Service Console navigation customization, and website integration steps outlined above, you now have Live Agent chat fully integrated into your instance of Service Cloud Console.
