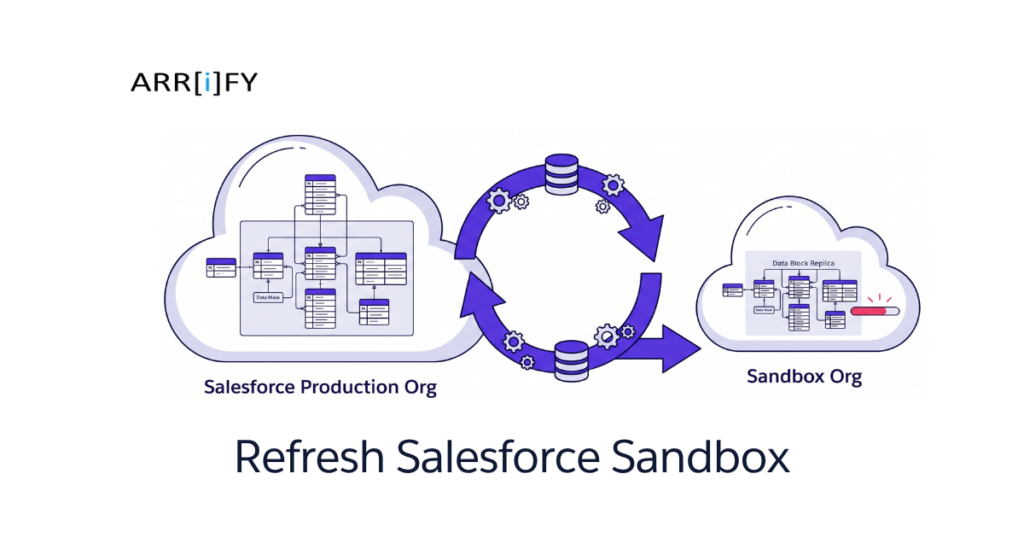
Refreshing your Salesforce Sandbox is like hitting the restart button on your computer. It is a very important process that updates your testing environment so it perfectly matches your live production setup. This gives you a blank, updated canvas to work on.
A sandbox provides a safe, secure playground. In it, you can test new features, fix bugs, and try out big changes without risking your actual business data or interrupting your daily operations.
What is a Sandbox in Salesforce?
Think of a Salesforce Sandbox as a clone of your main, live Salesforce environment (which we call “Production”).
You can create multiple sandbox environments for different uses—like one for developers to write code, one for testers to check features, and another to train new employees. Because these sandboxes are completely separate from your live organization, anything you do inside them will not affect your real customers or actual data.
Want to know more about the Salesforce Sandbox?
Why Should You Refresh Salesforce Sandbox?
Refreshing your sandbox regularly is a best practice. But why is it so important?
Keeps Data Current
Over time, your live production org changes. New custom fields are added, and new data comes in. Refreshing ensures your sandbox has the most up-to-date setup.
Better Bug Fixing
If you are trying to fix a bug that happens in live production, you need your sandbox to look exactly like production to quickly recreate and solve the issue.
Safe Project Launches
Before rolling out a major new app or update, testing in a freshly updated sandbox ensures everything will work smoothly when it goes live.
Before You Begin: The Pre-Refresh Checklist
Before you hit that refresh button, you need to prepare. Doing these steps will save your team from losing important work.
1. Checking the Sandbox expiration date
Open Sandbox

Open Sandbox and then go to Home Page.
Quick Search

Quickly search “Company Information” and open it.
View User Licenses

On the Company Information page, scroll down and you will see the User Licenses section. There you will find the Expiration Date of the sandbox.
2. Back Up Your Unsaved Work
Refreshing a sandbox completely wipes all of its current data. Before you proceed, you must back up your work! A strong Salesforce backup plan acts like an insurance policy for your data. It automatically protects your important settings and customer info from accidental deletions, damaged files, or even cyber threats like ransomware.
While Salesforce does offer built-in recovery features, they can sometimes be limited and costly. Because of this, many businesses rely on dedicated third-party backup solutions. These external tools give administrators an easy, automated way to safely recover data at scale.
Remember, keeping data secure is a “shared responsibility” between you and Salesforce. By being proactive and using a reliable backup tool, you ensure your business stays compliant and never loses important work—even if a mistake happens.
3. Decide What type of Sandbox you need
For effective Salesforce development, testing, and training, you must choose the right sandbox. There are four main types of sandboxes. Choose the one that fits your current project:
Developer Sandbox
A perfect setting for coding and testing in an isolated environment. There is a small amount of data storage and it is refreshed daily.
Developer Pro Sandbox
This is similar to the Developer Sandbox, but with more storage, so it’s suitable for more extensive development and quality assurance projects.
Partial Copy Sandbox
The data and metadata included in this package are a subset of what you use in production. With a refresh interval of five days, it can be used to test specific data sets and integrations.
Full Sandbox
A complete copy of your production environment, including all data and metadata. Best for performance testing, load testing, and staging, with a refresh interval of 29 days.
Selecting the right sandbox depends on your project requirements, the amount of data you need and the type of testing or development you plan to perform.
Refreshing Sandbox Salesforce Process
Now that you are prepared, let’s go through the simple steps to start the refresh.
Total Time: 10 minutes
Log in to your Production Org

Logging into your Salesforce Production Org. You must start the refresh process from your live, main Salesforce account.
Navigate to Sandbox Page

1. In the top right corner, click the gear icon to go to Setup.
2. In the Quick Find search box, type “Sandboxes” and click on the result.
Initiate the Refresh Process

1. Find the name of the sandbox you want to update.
2. Next to its name, click the Refresh link. (Note: If the link isn’t there, it means your sandbox isn’t eligible for a refresh yet).
3. Name the refresh, choose the type of sandbox you want, and click the Create or Next button.
Processing and Activation

1. After clicking on the refresh button, your refresh process will start and it will take some time to complete the process.
2. After the completion of the process, you can see the “Activate” button. Click on it and check the checkbox your sandbox activation process will start.
Monitor Refresh Status

1. If you want to check the refresh status then you need to Go to the Home page, then quick search for the “Deployment status” and click on it.
2. Then find the Refresh name and click on View Detail.
Explore Salesforce Change Sets: How to Initiate a Deployment.
Post-Refresh Tasks
Your sandbox is fresh and ready! Here is what you should do next:
1. Check Login access
Navigate to Sandbox

After your Sandbox is activated then you will see the log-in button. Click on it. It will redirect you to https://test.salesforce.com/ with your username.
Log In Properly

Fill in the Details like Username and Password and Click on the login button.
2. Share Access to Developers or Stakeholders:
After your sandbox is refreshed, getting your team back in is crucial for smooth collaboration. A refresh copies user settings from your live production environment, which means some people may temporarily lose their sandbox access.
To keep your workflow moving, you need to provide the right authorizations and login credentials to your project participants. This often means manually unlocking user accounts or resetting passwords. By quickly granting access, your team can instantly get back to testing, developing, and iterating on projects in the newly updated environment.
Best Practices for Sandbox Management
As more businesses rely on Salesforce for their CRM needs, managing your sandbox environment properly becomes essential. Good management ensures smooth daily operations, solid development, and easy deployments.
To get the most out of your Salesforce sandbox, follow these best practices:
Schedule Regular Refreshes
Don’t let your sandboxes get too old or out-of-sync with production.
Set a Schedule
Plan refreshes based on your project needs. For example, refresh Developer sandboxes daily, and Full sandboxes monthly or quarterly.
Automate Notifications
Set up automatic alerts to warn your team before a refresh happens and to notify them when it’s finished.
Use Sandbox Templates
Templates help you bring over only the specific data you need, ensuring data integrity and consistency.
Learn more about Salesforce Sandbox Template.
Maintain a Refresh Calendar
Communication is key to preventing lost work during a refresh.
Keep it Centralized
Use a shared calendar that every team member can easily access.
Stay Updated
Regularly update the calendar and notify stakeholders immediately if dates change.
Coordinate Carefully
Talk with your testing and deployment teams to make sure a refresh won’t interrupt critical project phases.
Document Changes and Configurations
Always keep track of what is happening inside your sandbox.
Maintain Change Logs
Keep detailed logs of all modifications made inside the sandbox.
Use Version Control
Track changes in your code and metadata using a version control system.
Follow Standard Procedures (SOPs)
Create simple, standard rules for your team on how to document and implement changes so everyone is on the same page.
Resources
The official document on Refresh Your Sandbox
What Happens When a Sandbox Is Refreshed
Known More about Salesforce Sandbox.
Questions
What exactly does Refreshing Sandbox do?
Conclusion
Refreshing your Salesforce sandbox is a powerful way to ensure your team is always building and testing on an accurate, clean environment. By taking a few minutes to back up your data, communicate with your team, and follow a simple step-by-step checklist, you can prevent errors and speed up your Salesforce projects.
Frequently Asked Questions (FAQ)
How often should you refresh a sandbox in Salesforce?
Developer & Developer Pro : Daily refreshes for active development.
Partial Copy : Refresh every 5 days for comprehensive testing.
Full : Refresh monthly for final-stage testing.
What are the considerations for sandbox refresh?
Data Backup: Ensure critical data is backed up before refreshing to prevent data loss.
Scheduled Downtime: Plan refreshes during off-peak hours to minimize disruption to users.
Integration Testing: Verify integrations post-refresh to ensure seamless functionality.
User Permissions: Re-establish user permissions and access settings as needed.
Configuration Updates: Update any configurations or customizations after the refresh to align with production.
Testing Plans: Review and adjust testing plans to reflect the refreshed environment.
Communication: Notify relevant stakeholders about the refresh schedule and any potential impact.
What exactly does refreshing a sandbox do?
It completely erases the current sandbox and replaces it with a fresh, updated copy of your live production environment. All old test data in that sandbox is gone forever.
How long does it take to refresh a Sandbox?
It varies heavily. A small Developer Sandbox might take 10 minutes, while a massive Full Sandbox with years of data might take several days.
Can I refresh a Sandbox from another Sandbox or production org?
Yes, you can refresh a Sandbox from another Sandbox or production org. This process allows you to copy data and metadata from one environment to another for testing and development purposes.
Why is the “Refresh” button missing or grayed out?
This usually happens for two reasons: either the required wait time hasn’t passed since your last refresh (e.g., waiting 29 days for a Full Sandbox), or your organization has reached its limit for that specific sandbox license.
Do record IDs change when a Sandbox is refreshed?
Yes. A refreshed sandbox is technically a brand-new environment. Even if the data looks identical to production, the unique Record IDs (and the Org ID) will change. Because of this, developers should avoid hard-coding IDs into their configurations.
Why do users have “.invalid” at the end of their emails?
When a sandbox refreshes, Salesforce automatically adds “.invalid” to the end of user email addresses. This is a safety feature to prevent the sandbox from accidentally sending test emails to real people. An admin must manually remove the “.invalid” extension before users can receive password reset emails.