If you spend a lot of time working in Salesforce, you know how frustrating it can be to constantly switch between tabs, open new windows, or lose your place just to note down a quick note or make a phone call.
This is exactly where the Salesforce Utility Bar comes to the rescue.
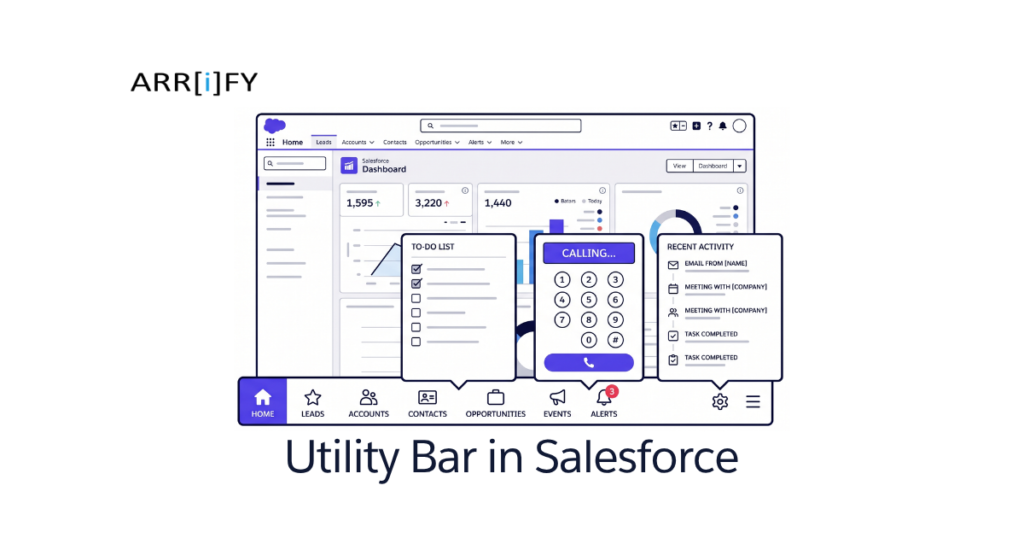
Think of it as a handy dock or taskbar sitting quietly at the bottom of your Salesforce Lightning screen. It keeps your most important tools, shortcuts, and actions just a single click away.
In this guide, we’ll walk through what the utility bar is, why you need it, and how you can easily set it up to make your workday a lot smoother.
What is the Utility Bar in Salesforce?
In simple terms, the Utility Bar is a fixed toolbar at the bottom of the Salesforce Lightning interface. It gives users instant access to essential tools like calculators, recent items, notes, or even a softphone without ever forcing them to leave the page they are currently working on.
Whether you are a sales rep quickly checking a report chart or a support agent managing incoming chats via Omni-Channel, the utility bar ensures you stay focused and productive.
Why Should You Use It?
Highly Customizable
You can customize the bar specifically for different teams. What your marketing team needs will look very different from what your customer service team uses.
Saves Time
Stop navigating away from important records to do simple tasks.
Boosts Focus
Keep your current workspace open while you use a pop-up tool.
How to enable Utility Bar in Salesforce?
Setting up a utility bar is straightforward. You don’t need to be a coding expert to get it done. Here is a simple, step-by-step breakdown:
Total Time: 10 minutes
Navigate to Setup
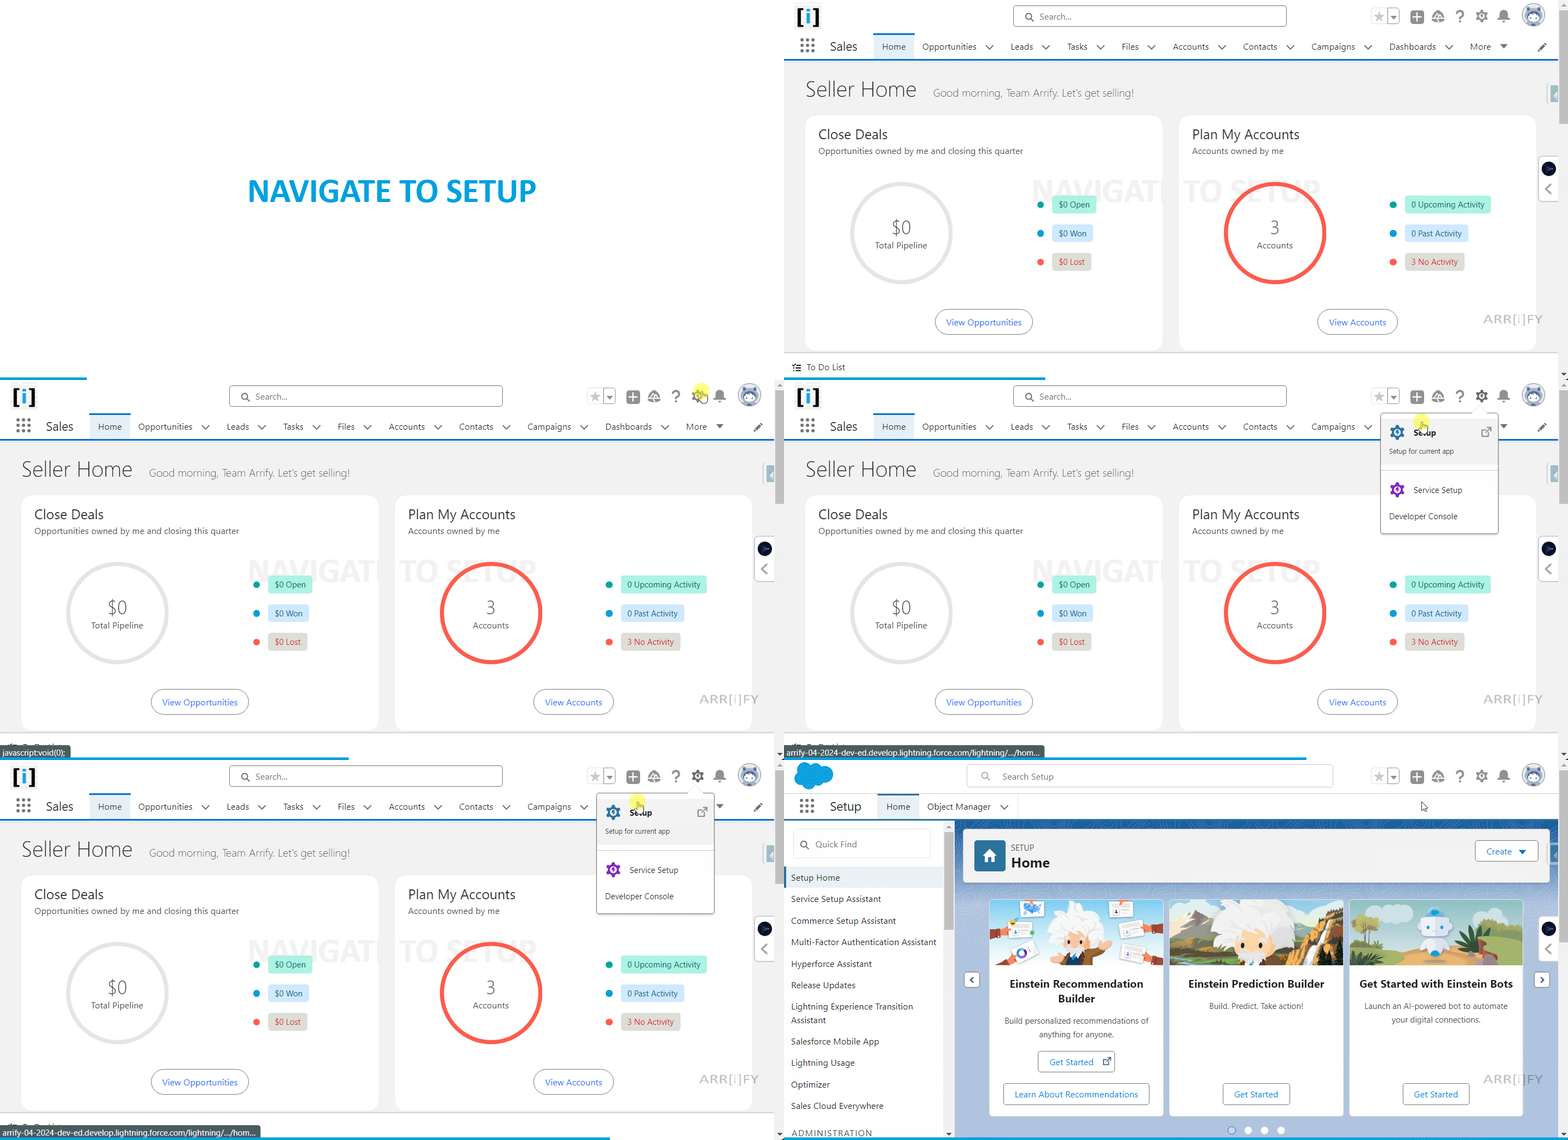
1. First, log into Salesforce.
2. Click on the Gear icon in the top-right corner of your screen and select Setup from the dropdown menu.
Access App Manager
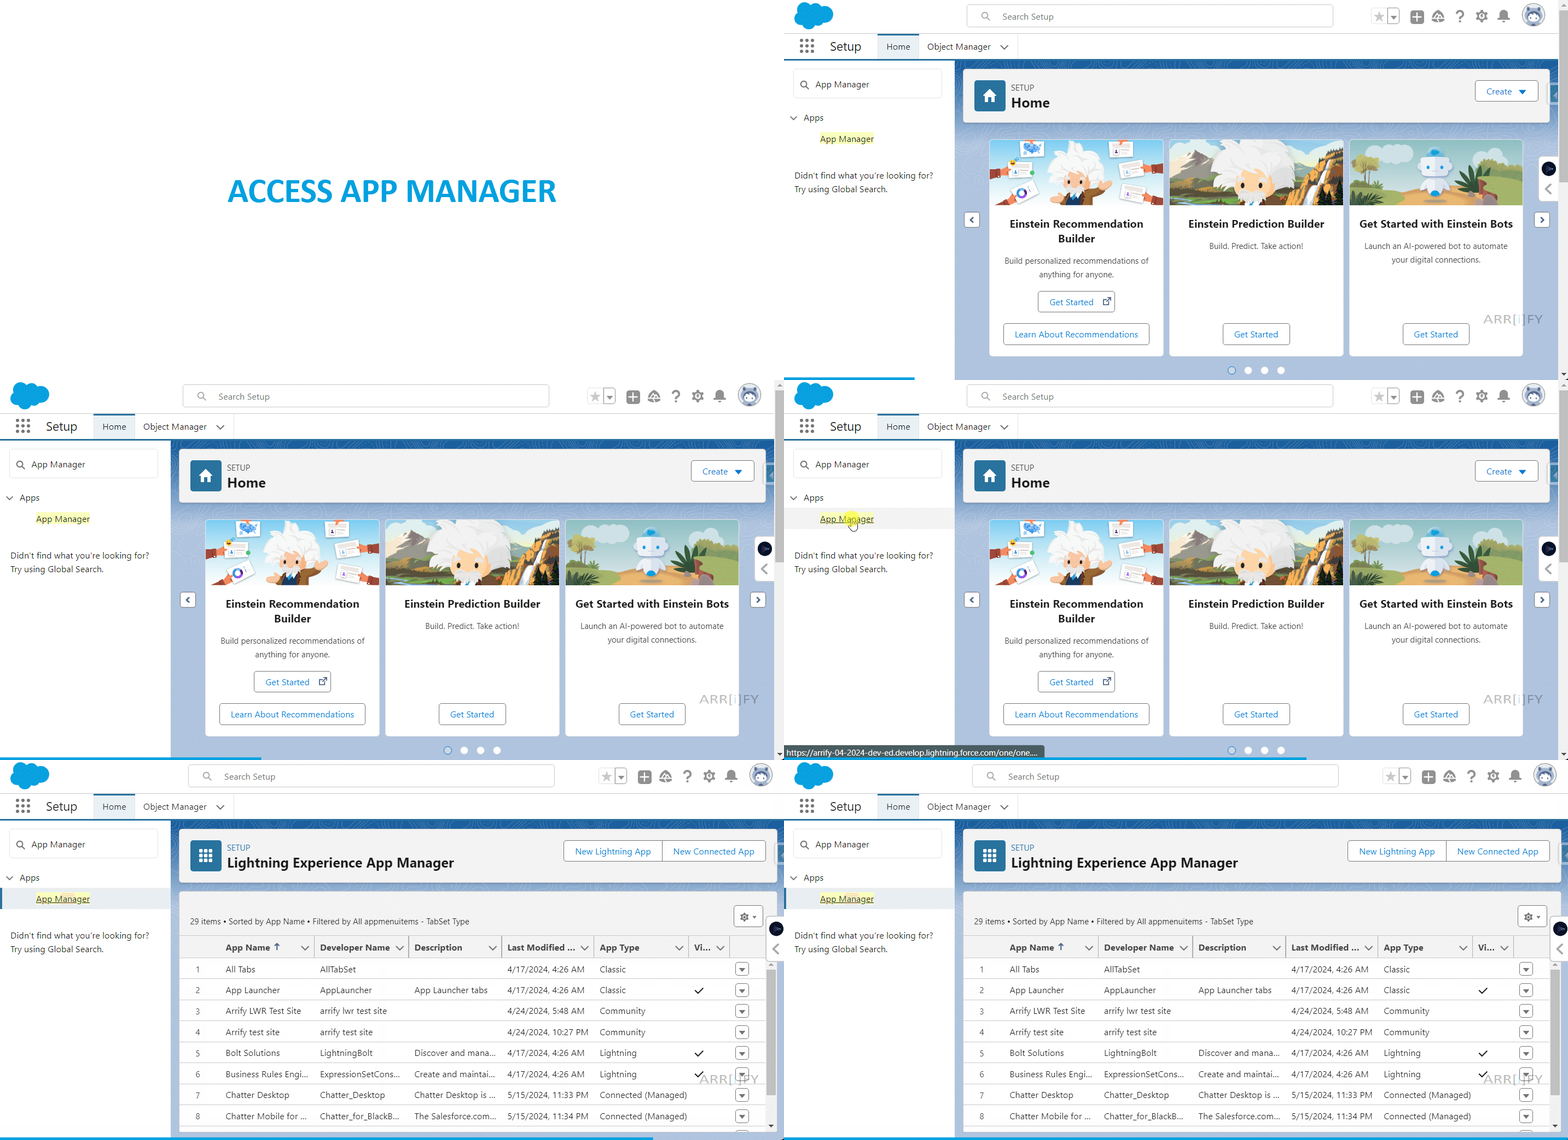
In the Quick Find box on the left, type in App Manager and click on it when it appears. This is where all your Lightning Apps live.
Edit an Existing App or Create a New One
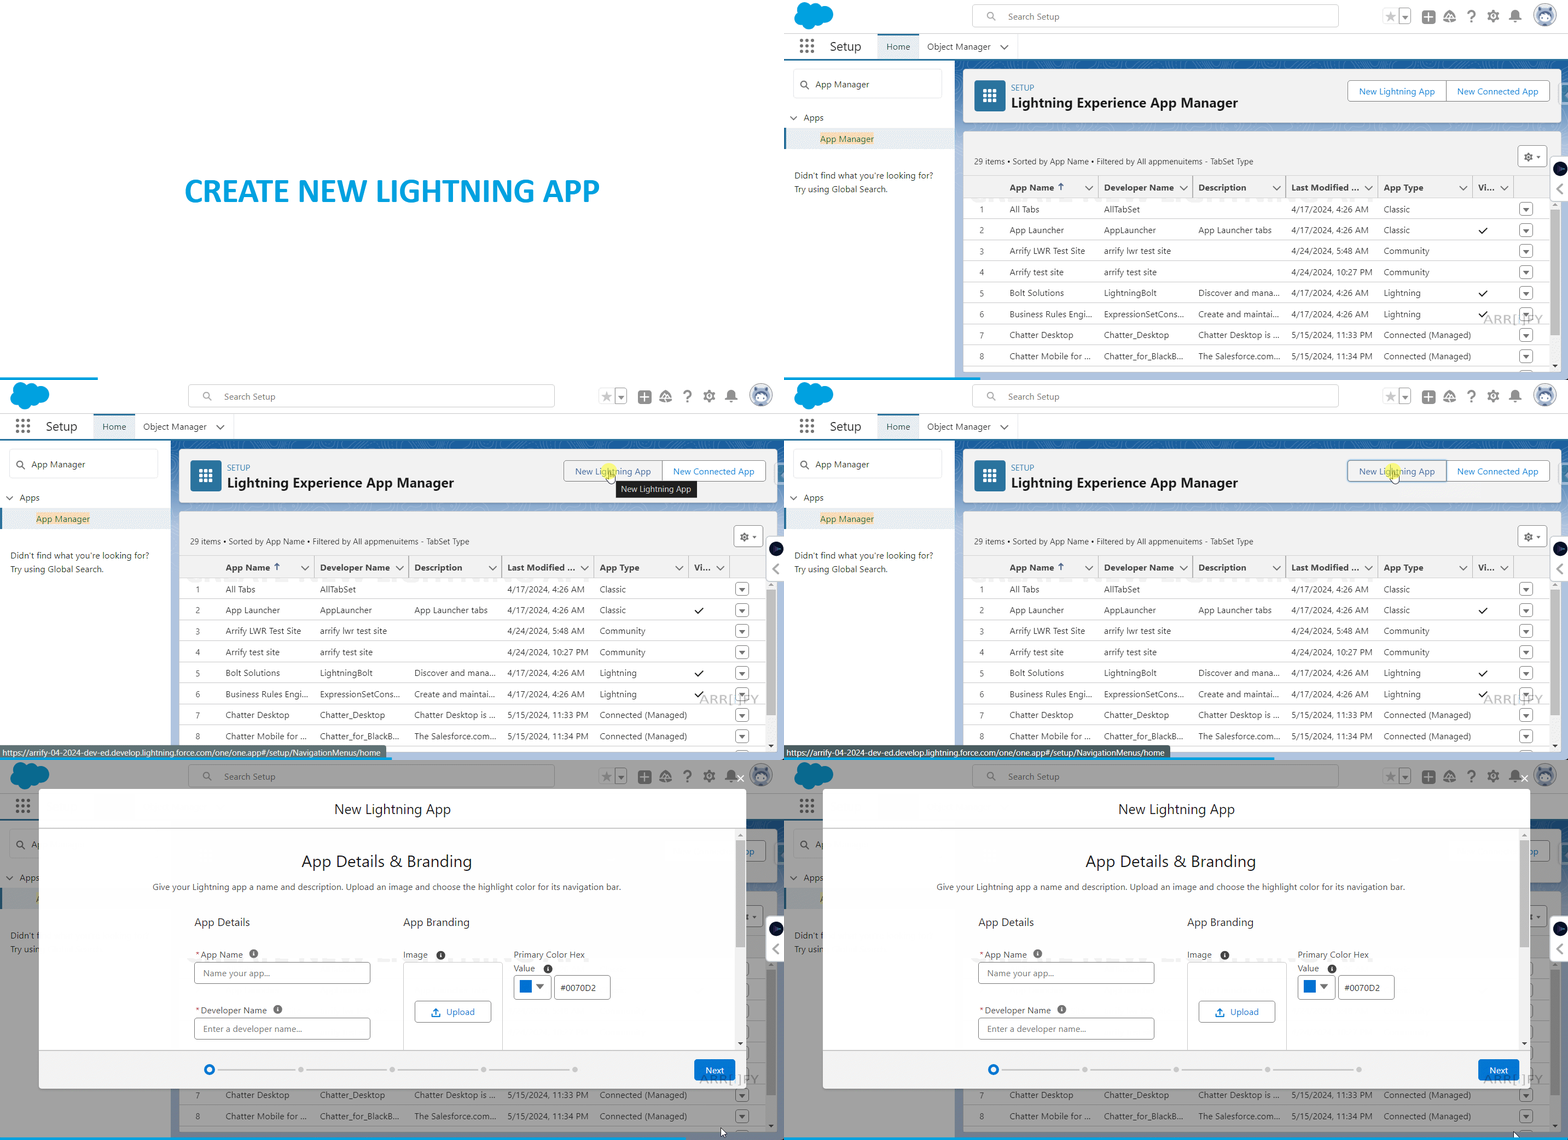
You have two choices here. You can either click the New Lightning App button to build a fresh app from scratch, or you can find an existing app (like “Sales” or “Service”), click the dropdown arrow on the far right, and hit Edit.
App Details and Utility Item
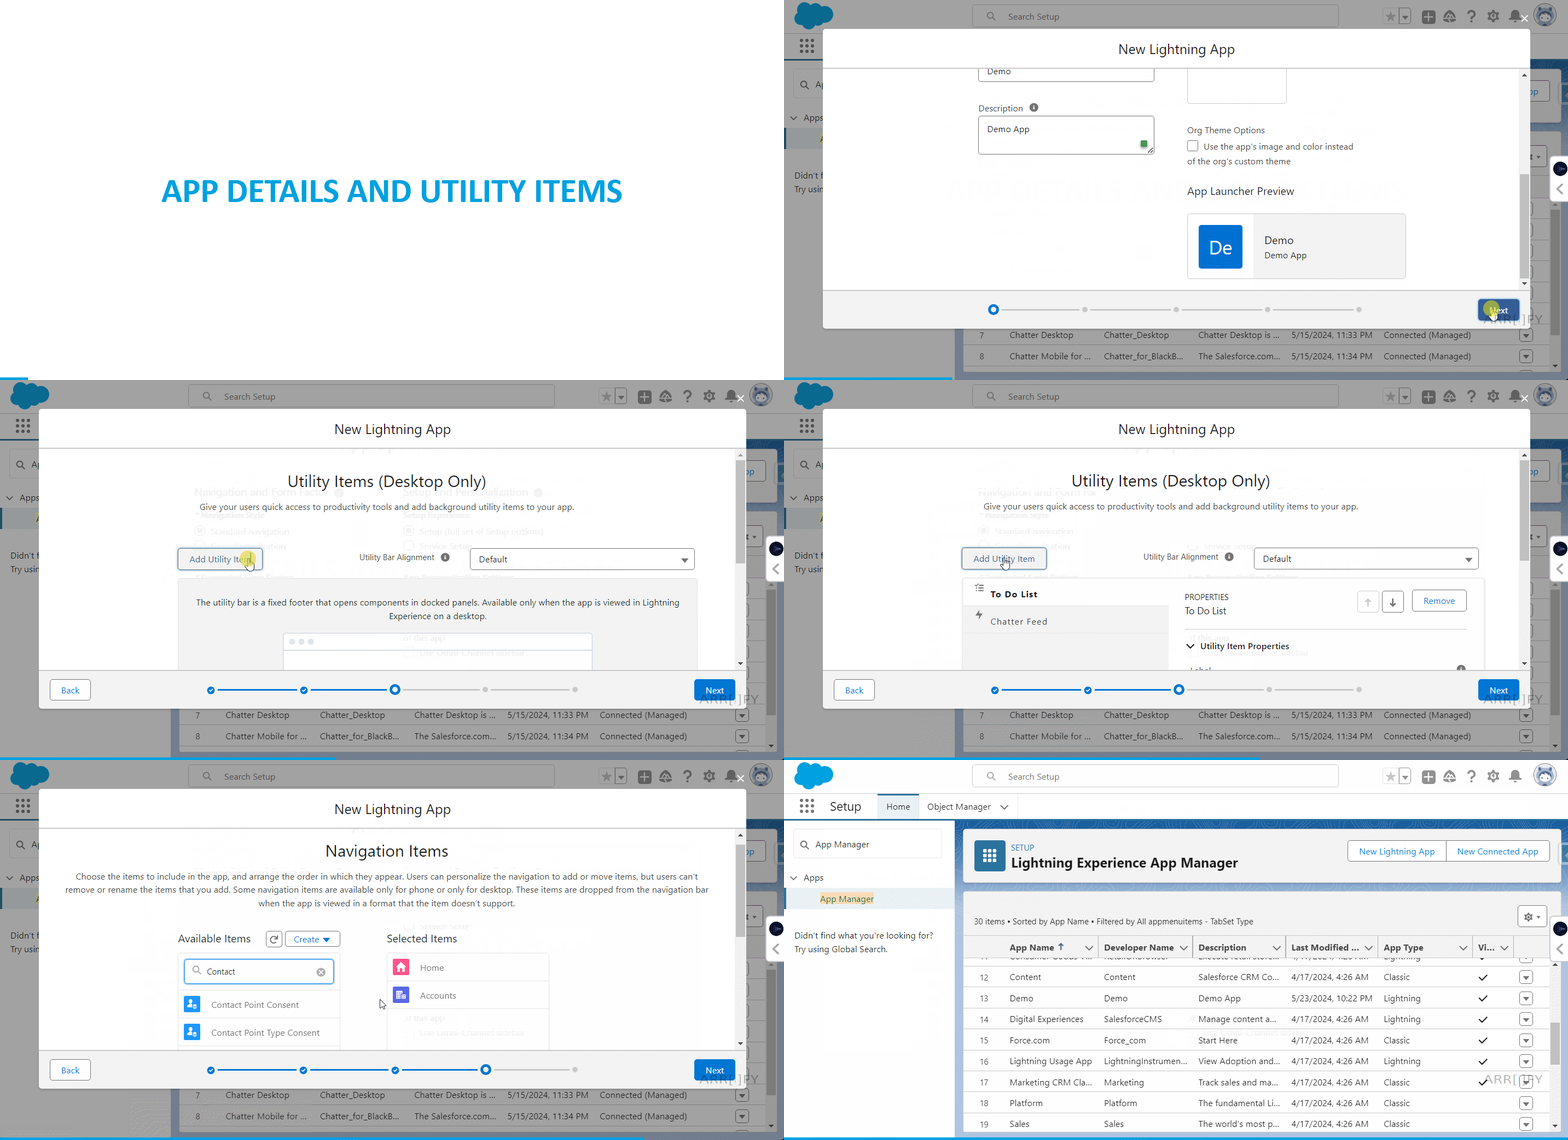
In this step, we are providing all the necessary information to create a new lightning app and select all the Utility items that we want to show on the Lightning App.
1. In the App Settings, scroll down to the Utility Bar section and click on Add Utility Item.
2. Select the utilities you want to add from the available options, such as Notes, Chatter Feed, etc.
3. Configure the properties of each utility, including the label, icon, and utility-specific settings.
4. Once you’ve added and configured all desired utilities, click Save.
Navigate to New Lightning App
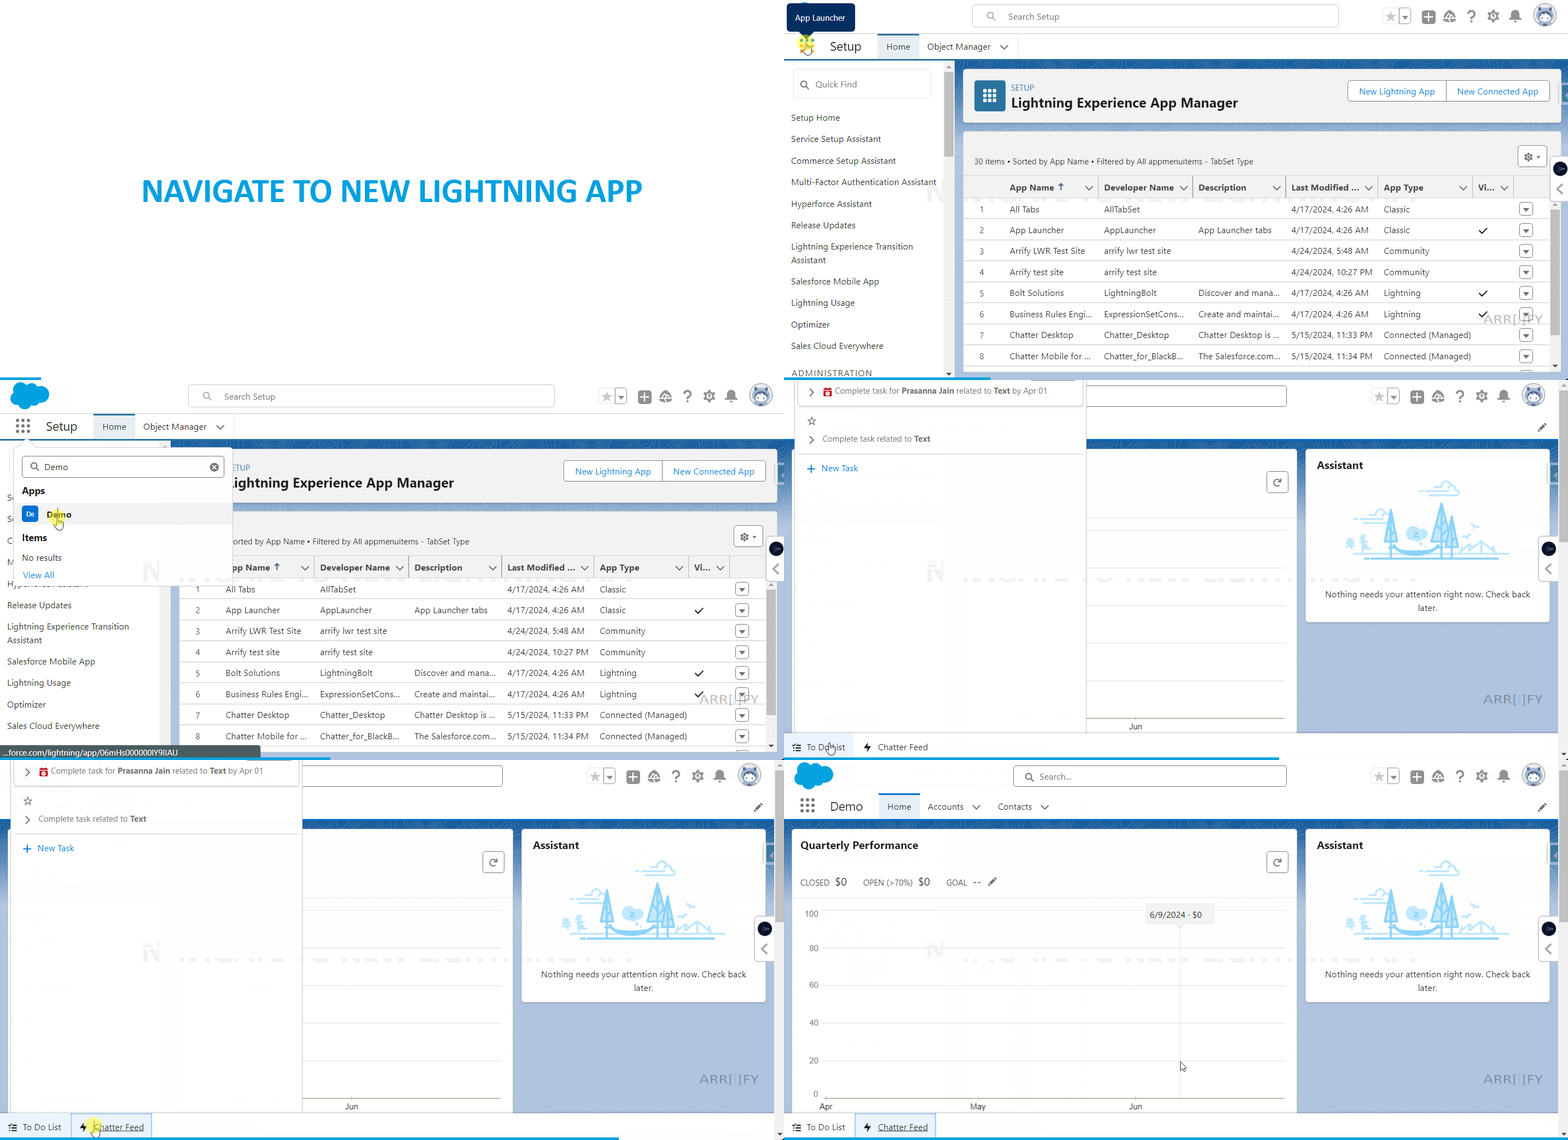
Once you are happy with your choices, make sure the app is assigned to the right user profiles under the “User Profiles” tab. Click Save.
Finally, open your Lightning App to see your brand-new utility bar in action. Try clicking the tools to make sure everything looks and feels right!
Customizing the Utility Bar in Salesforce
Before diving into customization, it’s essential to identify the key functions and tools your team frequently utilizes. This could include accessing reports, creating records, launching specific apps or even integrating third-party applications.
Edit an Existing App

Once in Setup, search for “App Manager” in the Quick Find box and select it. Then, choose the Lightning app you want to customize the Utility Bar for. Click on the “Edit” button next to the selected app.
Edit Utility Items

In the App Editor, you’ll see the Utility Bar section. Here, you can add or remove items as per your requirements. Salesforce provides various standard components like Actions, Recent Items, Notes, etc. You can also add custom components or third-party integrations using Lightning Components.
Add the items on the Utility Bar according to their priority and frequency of use. You can drag and drop items to reorder them as needed.
Before finalizing your customization, it’s advisable to preview the changes to ensure everything looks and functions as intended. Once satisfied, click ‘Save’ to apply the changes.
Navigate to the Lightning App

Navigate to the Lightning App and see the changes you have made.
Utility Bar in Salesforce may be customised to give your team easy access to the features and tools they use most frequently, which can streamline their workflow and increase productivity. In the long term, this minor adjustment can have a big impact and further customise Salesforce to meet the specific needs of your company.
What Type of Items Can Be Added?
The utility bar supports two main categories of items: Standard Utility Items and Custom Utility Items.
Standard Utility Items
| Utility Item | Description | Common Use Case |
|---|---|---|
| Notes | Jot down notes quickly without leaving the current page. | Keeping track of thoughts or meeting minutes during a client call. |
| History | Lists recently accessed records and items. | Navigating back to records worked on earlier in the day. |
| Omni-Channel | Manages and routes work items to agents in real time. | Call centers and support teams handling customer service cases. |
| Open CTI Softphone | Integrates an external phone system directly inside Salesforce. | Sales reps making outbound calls with click-to-dial functionality. |
| Recent Items | Displays a list of recently viewed records. | Returning to active opportunities or accounts quickly. |
| Macros | Automates repetitive tasks (e.g., sending templates, updating fields) with one click. | Streamlining customer service responses and record updates. |
| Calculator | A simple calculator utility. | Performing quick math without launching a separate desktop app. |
| List View | Displays a list view of records for a specific object. | Monitoring a queue of incoming leads or new support cases. |
| Flow | Runs a specific Salesforce Screen Flow. | Guiding users through standard procedures like lead qualification. |
| Chatter Feed | Displays the Chatter collaboration platform. | Posting updates and collaborating with colleagues on active files. |
| Visualforce Page | Embeds a custom Visualforce page. | Displaying legacy custom functionality or page layouts. |
| Report Chart | Displays a chart based on a Salesforce report. | Getting quick visual insights into key sales metrics or team targets. |
| Quip Association | Associates Quip documents and threads with Salesforce records. | Working on collaborative documents directly within the CRM. |
| Quip Notification | Provides alerts and notifications from Quip documents. | Keeping users updated on collaborative documents. |
Custom Utility Items
Custom Lightning Components
Developers can build and add custom Lightning Web Components (LWC) or Aura components. This is ideal for tailored business needs, such as a custom task tracker or specialized data entry forms.
Third-Party Integrations
You can integrate third-party applications using custom components or pre-built AppExchange packages. This extends your Salesforce workspace to include external tools like document signing systems, external messaging channels, or custom databases.
Best Practices for a High-Performing Utility Bar
While it is tempting to add every tool available, overloading your utility bar can slow down your Salesforce page load speeds and clutter the user interface. Follow these best practices to keep it fast and useful:
Limit the Item Count
Stick to 4–5 essential items per app. Too many items will crowd the bottom of the screen and confuse users.
Use Profile-Specific Apps
Create different Lightning Apps for different departments. Give your support agents Omni-Channel and History, while giving your sales reps Softphone, Notes, and Report Charts.
Be Selective with “Start Automatically”
Only auto-start utilities that are absolutely required on login (like phone systems or chat queues). Auto-starting too many components will slow down the initial application load time.
Choose Clean Icons
Select recognizable, standard icons for each utility item so users can quickly identify them.
Resources
Official document for Adding Utility Items on the Lightning App
Official document for learning Customize your Lightning App
FAQ
Are there any keyboard shortcuts for using the Utility Bar?
Yes, you can use the keyboard shortcut g, then u to go to the utility bar in Salesforce.
Can I access the Utility Bar in Salesforce mobile app?
The Lightning Experience utility bar isn’t available in the Salesforce mobile app.
What types of notifications are displayed in the Utility Bar in Salesforce?
These types of notifications are displayed in the Utility Bar in Salesforce:
[1] System Updates
[2] User Alerts
[3] Task Reminders
[4] Messages and Chats
[5] Error Notifications
[6] Subscription Updates
[7] Security Alerts
[8] Feedback and Announcements
Can I configure which notifications appear in the Utility Bar?
Yes, you can configure which notifications appear in the Salesforce Utility