
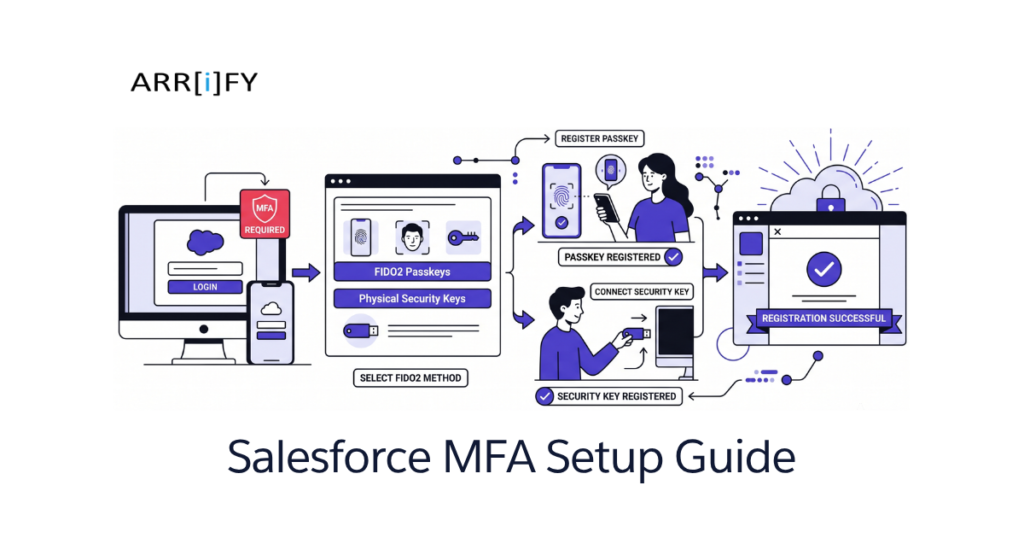
So, you’ve heard the news: Salesforce is enforcing new MFA rules for highly privileged users. If you have permissions like System Administrator, Modify All Data, or Author Apex, the days of typing in a six-digit code from your phone are officially over.
To comply with this new mandate and protect your org from sophisticated credential theft (like Adversary-in-the-Middle attacks), your Salesforce MFA setup must now use an authentication method built on the FIDO2 / WebAuthn standard.
If that sounds highly technical, don’t worry. In practice, it simply means you need to register a Hardware Security Key (like a YubiKey) or a Built-in Authenticator (like Apple Touch ID, Windows Hello, or an iCloud passkey).
Because these methods use public-key cryptography that is bound to the actual login.salesforce.com URL, they are immune to phishing. Even if a hacker builds a perfect clone of the Salesforce login page, your YubiKey or passkey will refuse to hand over the credentials.
Here is the exact, step-by-step process for completing your Salesforce MFA setup today.
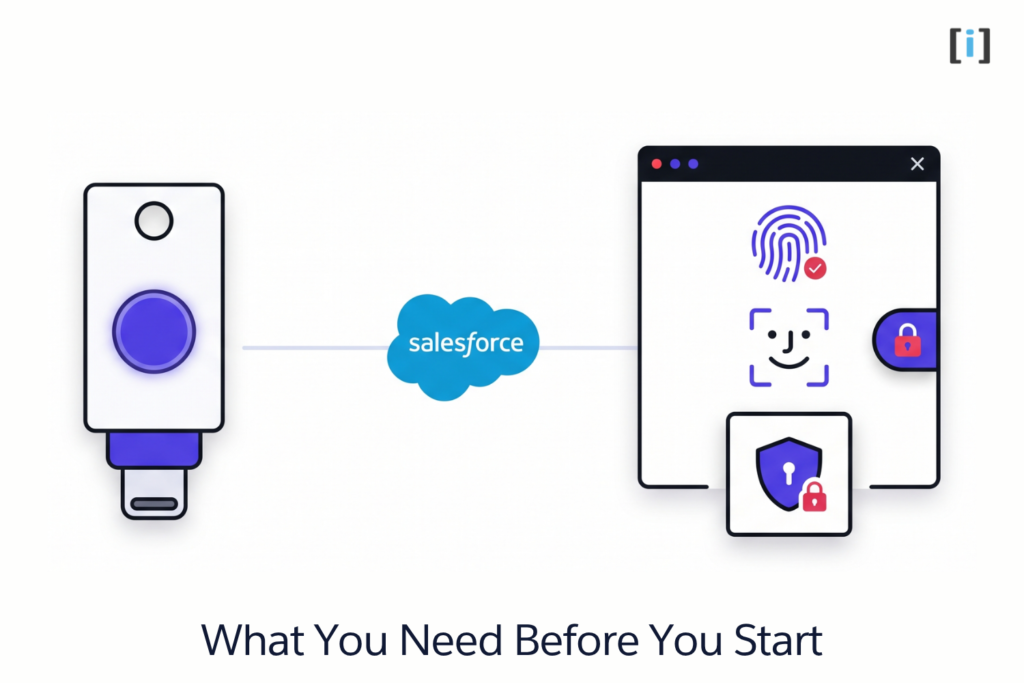
Prerequisites: What You Need Before You Start
Before you start clicking around in Salesforce Setup, make sure you have the right hardware and software ready to go. (Not sure if this new mandate applies to your specific org or SSO setup? Read our complete breakdown on who is affected by Salesforce’s phishing-resistant MFA enforcement first).
1. The Right Hardware
- A Physical Security Key: A U2F or WebAuthn-compliant hardware key. The most common enterprise choices are the YubiKey 5 Series or the Google Titan key. Make sure you have the right connector for your machine (USB-A, USB-C, or Lightning) and that it is plugged in securely.
- Or, a Built-in Device Authenticator: A computer equipped with a biometric scanner (Apple Touch ID on Mac, Face ID, or Windows Hello on PC) or a cloud-synced password manager that supports passkeys (like 1Password, lastpass, or Apple iCloud Keychain).
2. Browser Compatibility
WebAuthn relies heavily on modern web browsers. Ensure you are using the latest version of Google Chrome, Mozilla Firefox, Microsoft Edge, or Apple Safari. If you are using an outdated browser or operating system, Salesforce may block the registration process.
Step 1: Start Your Salesforce MFA Setup in User Details
Unlike org-wide settings that a System Admin handles in the backend setup menu, MFA registration must be done by the individual user on their own personal profile.
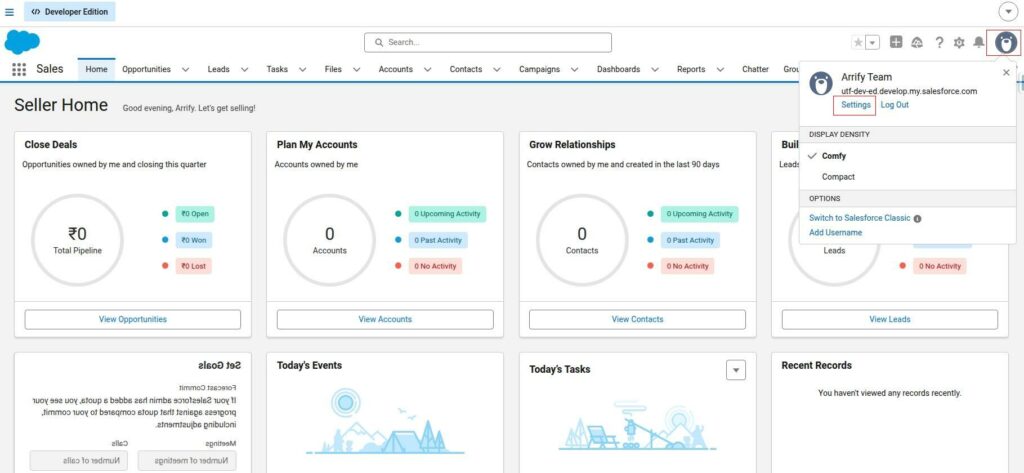
Log in to Salesforce
- Click your Profile Avatar in the top-right corner of the screen.
- Click Settings from the dropdown menu.
Navigate to Advanced User Details
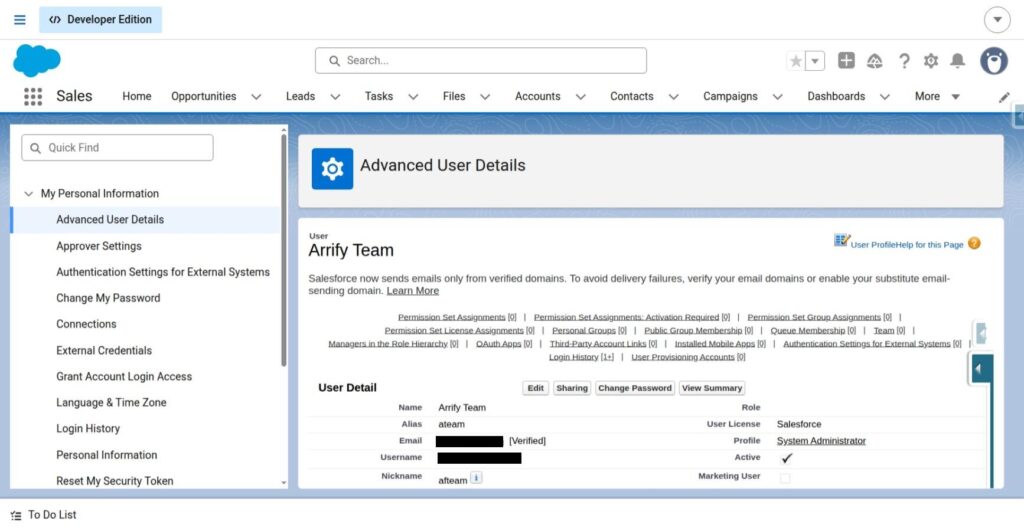
- In the left-hand navigation menu.
- expand My Personal Information, Click on Advanced User Details.
Step 2: Register Your Authenticator
Scroll down your Advanced User Details page until you see the section related to security and MFA. The exact naming convention varies slightly depending on what type of authenticator you are trying to register.
Option A: Registering a Physical Hardware Key (YubiKey)
If your company mandates physical, device-bound security keys, follow these steps:
Find the field labeled Security Key (U2F or WebAuthn)
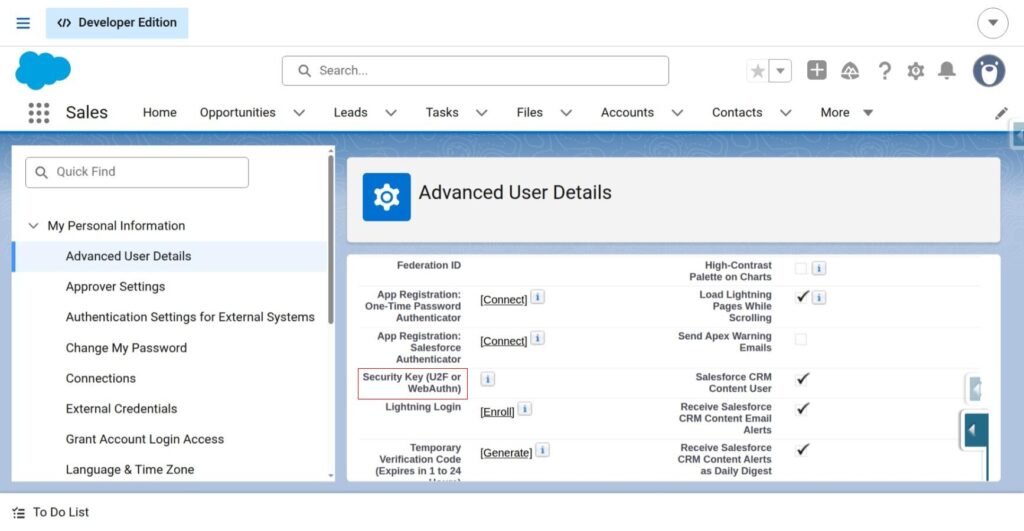
If you navigate to your Advanced User Details and see find the field labeled Security Key (U2F or WebAuthn) but “register” button hide, don’t panic!
Salesforce disables self-registration by default until MFA permissions are granted to your account. Before individual users can register their FIDO2 passkeys, a System Admin must enable Security Keys in the org and assign the MFA permission.
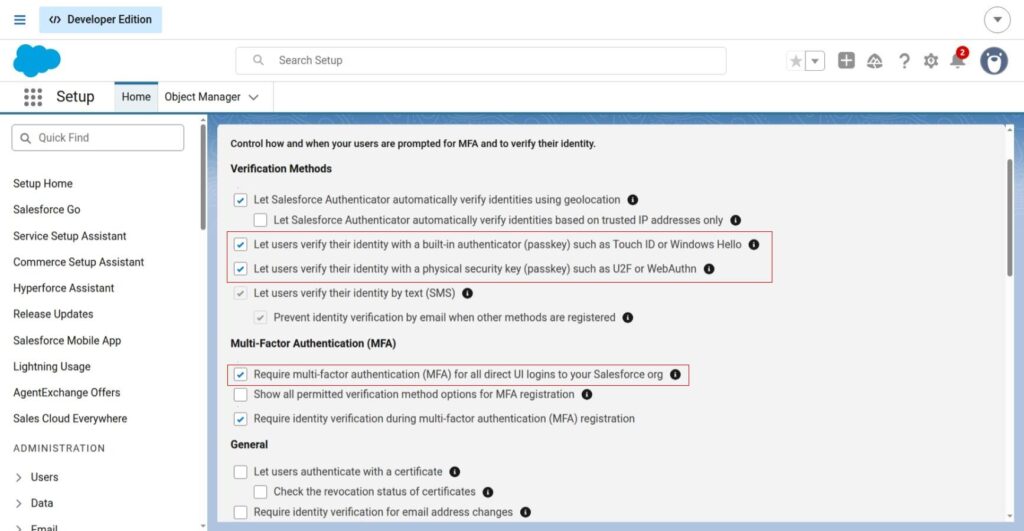
Turn on MFA Org-Wide
- Go to Setup (gear icon) -> type Identity Verification in Quick Find.
- Click Identity Verification.
- Look for the top checkbox:
- Require multi-factor authentication (MFA) for all direct UI logins to your Salesforce org.
- Let users verify their identity with a built-in authenticator (passkey) such as Touch ID or Windows Hello
- Let users verify their identity with a physical security key (passkey) such as U2F or WebAuthn
- Check that box and click Save at the bottom.
Go back to Security Key (U2F or WebAuthn)
- Click the Register button next to it.
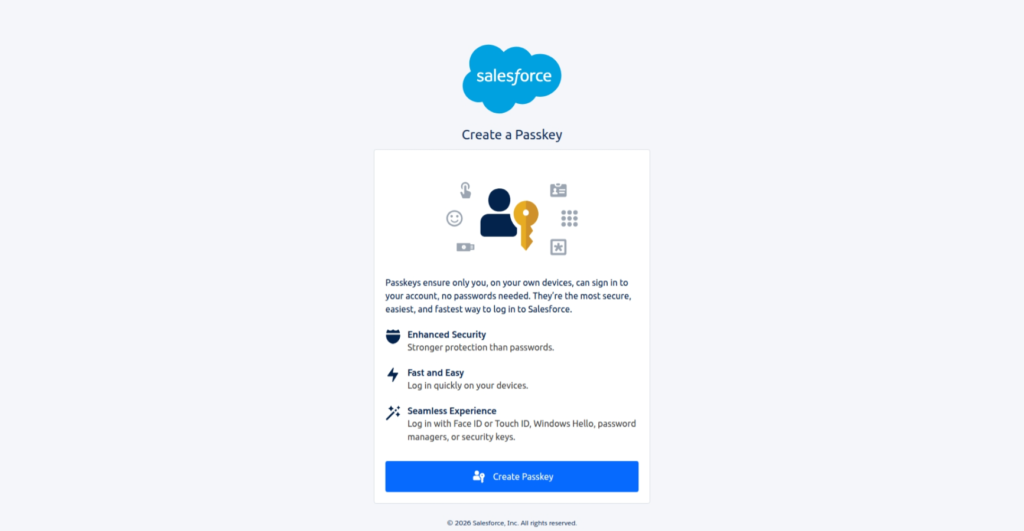
- Salesforce will open the “Create a Passkey” registration screen.
- Click the prominent blue
Create Passkeybutton at the bottom of the screen.
Your web browser or operating system will open a native security prompt
- For YubiKey / Hardware Keys: Insert your security key into your USB port and tap the gold disk/button on the key.
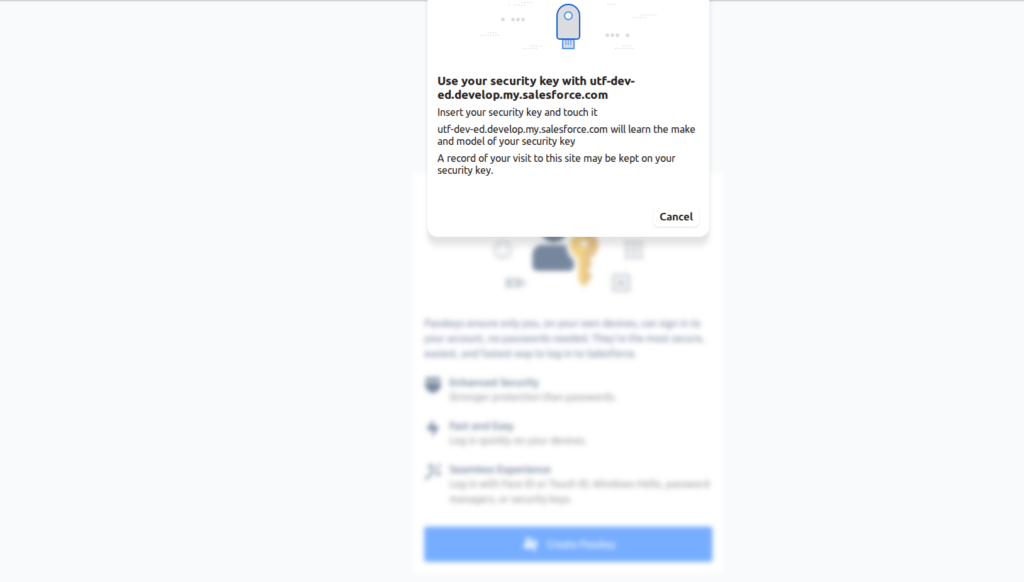
- (Crucial Step): Once authenticated, Salesforce will prompt you to assign a name to your passkey. Do not leave it as the default! Name it something descriptive so you can easily identify and manage it later.
- Click Save or Done to complete your registration.
Option B: Registering a Built-in Authenticator or Passkey
If you don’t have a physical USB YubiKey, Salesforce allows you to use a Built-in Authenticator (device-bound biometrics) or a Passkey stored in your browser or password manager (Google Password Manager, 1Password, iCloud Keychain, etc.).
Method 1: Built-in Authenticator (Touch ID / Windows Hello)
Use this option if your computer has a built-in fingerprint reader, facial recognition camera, or TPM chip.
- In Advanced User Details, locate the field labeled Built-in Authenticator.
- Click Register.
- When prompted by your browser/OS, verify your identity using Apple Touch ID, Face ID, or Windows Hello PIN/Fingerprint.
- Enter a descriptive name for your authenticator (e.g., “MacBook Pro Touch ID”) and click Save.
Method 2: Passkey via Browser or Password Manager (LastPass / Google Password Manager / 1Password)
Use this option if you don’t have built-in biometric hardware, or if your organization uses a cloud-synced passkey manager like LastPass.
Initiate Passkey Registration
- Locate Security Key (U2F or WebAuthn).
- click Register.
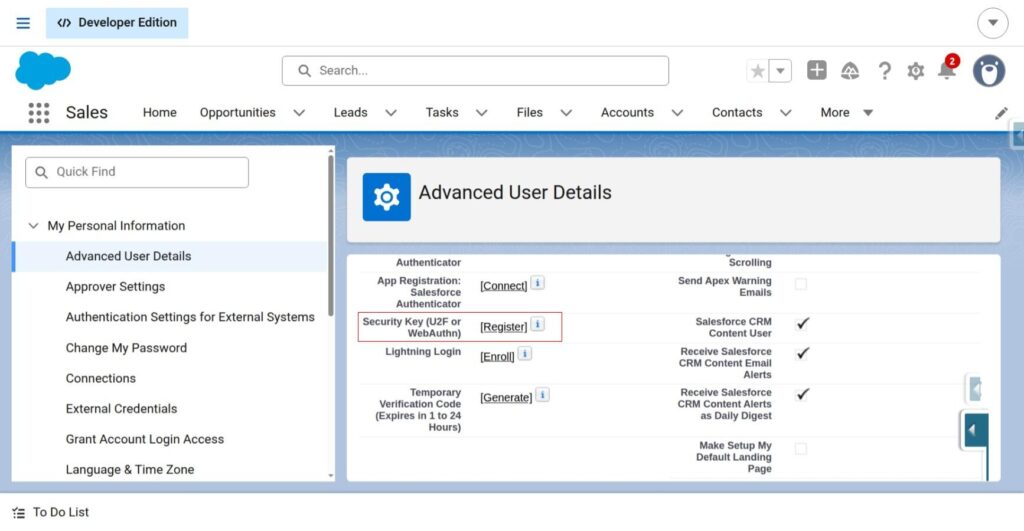
Launch Salesforce Modal
- Salesforce will open a modal titled “Create a Passkey”.
- Click the blue Create Passkey button.
Select Your Passkey Provider
- Your browser will display a prompt asking where to store your passkey (e.g., LastPass, 1Password).
- Select your provider.
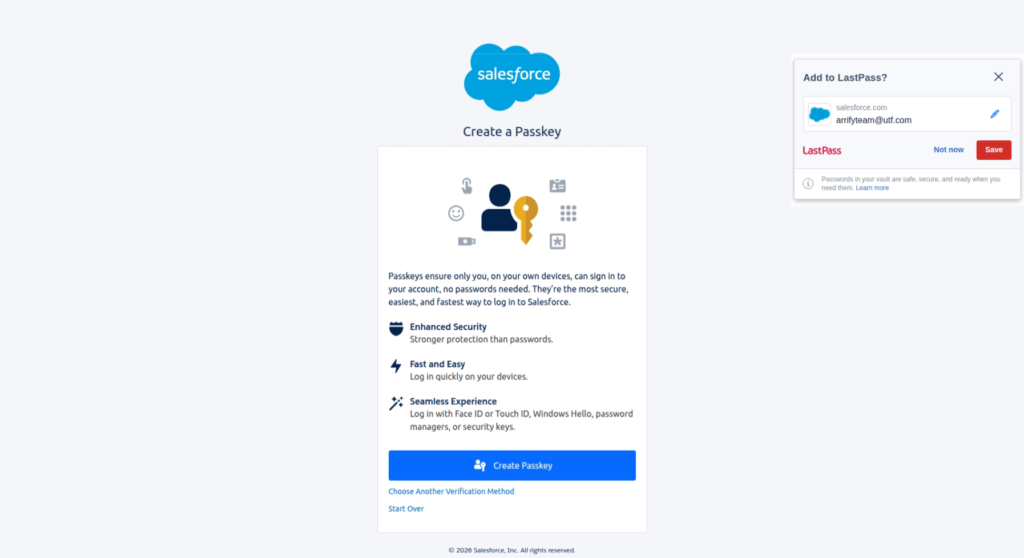
Authenticate Passkey Manager
- LastPass : Click Save Passkey or confirm Master Password/Vault prompt inside the extension popup.
- Name Your Passkey: Enter a clear label identifying the device or manager.
- Confirm Registration: Click Save. Verify that your newly created passkey appears in your registered verification methods list.
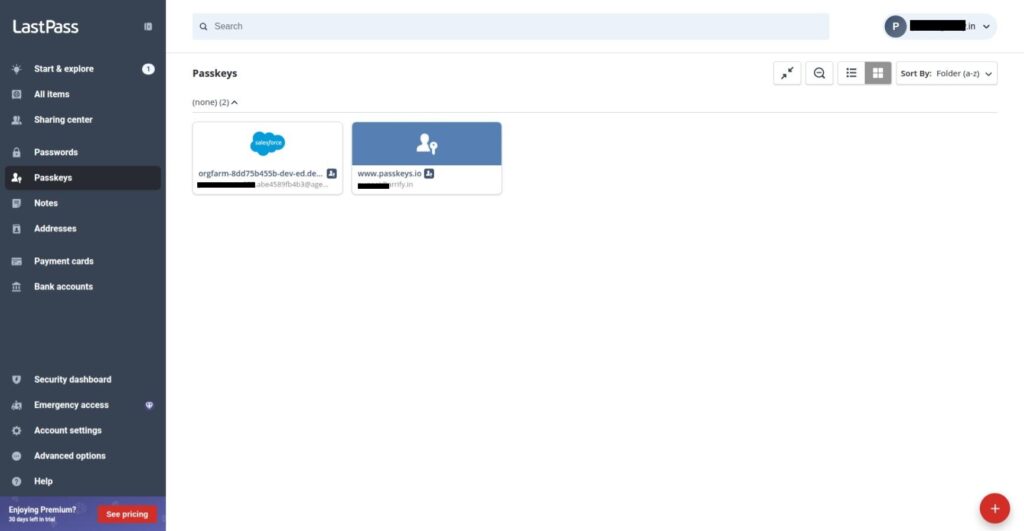
Step 3: Test Your New Login
Don’t wait for an emergency or production deployment to find out if your setup works. Test your MFA immediately:
Login to Salesforce
- Log out of Salesforce completely.
- Navigate to
login.salesforce.com(or your custom MyDomain URL) and enter your credentials.
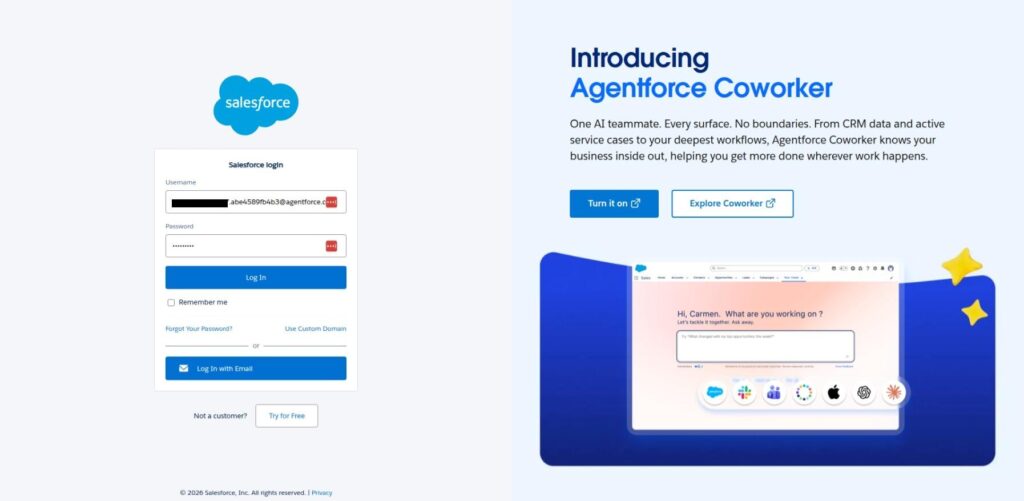
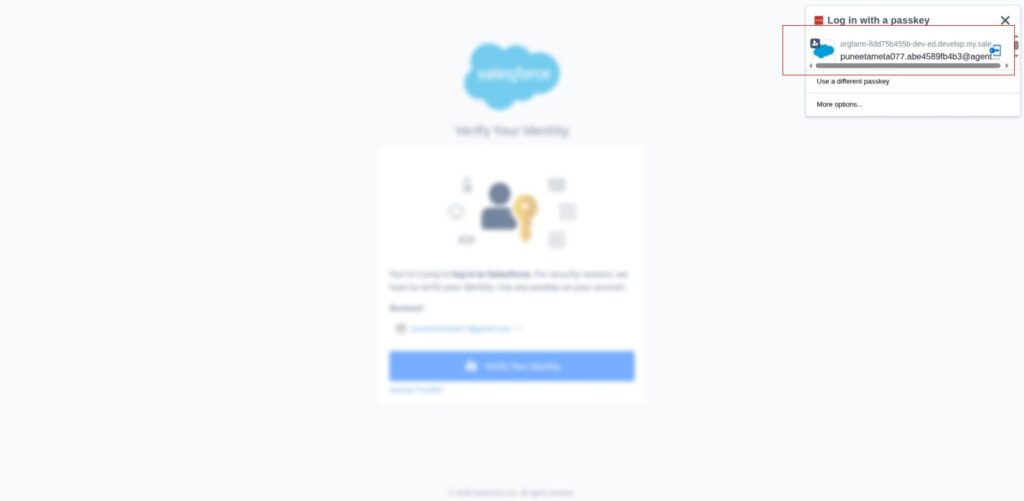
Login via Passkey
- When prompted for WebAuthn authentication, tap your YubiKey, scan your fingerprint, or confirm your Passkey prompt.
- You should be granted access instantly without needing a 6-digit TOTP code.
Critical Best Practice: Register a Backup Method
What happens if you leave your YubiKey at home or fry your laptop’s fingerprint scanner? If you only have one registered method, you will be locked out.
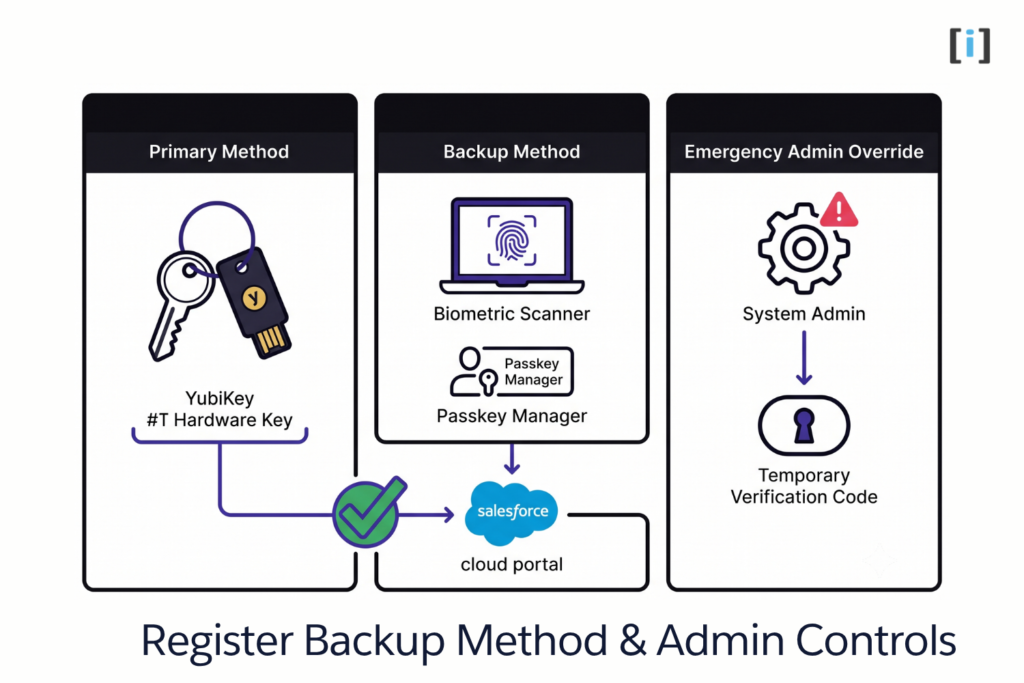
Every privileged user should register at least two MFA methods.
Recommended Setup:
- Primary Method: Physical YubiKey (Security Key) attached to your keychain.
- Backup Method: Laptop biometric scanner or Google Password Manager / 1Password Passkey.
If disaster strikes and both methods are unavailable, a secondary System Administrator must generate a Temporary Verification Code from the Setup menu to restore access.
Admin Controls: How to Revoke a Lost Key
If you are a System Administrator, you aren’t just managing your own keys—you are managing everyone else’s. If a privileged user loses their YubiKey on a business trip, you must revoke it immediately to prevent unauthorized access.
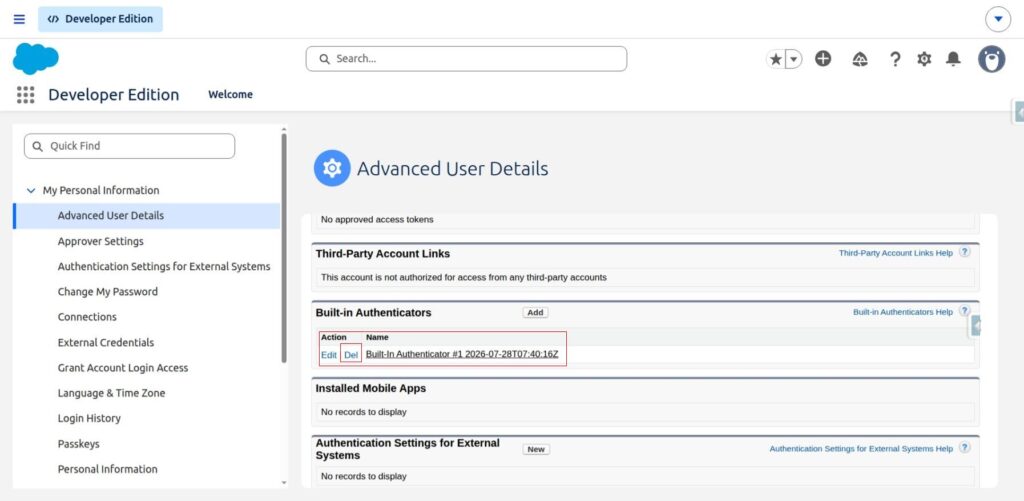
To revoke a lost key
- Go to Setup (the gear icon).
- Type Users in the Quick Find box and click on Users.
- Click on the name of the user who lost their key.
- Scroll down to the Security Key (U2F or WebAuthn) related list or Built-in Authenticator field.
- Click Disconnect or Revoke next to the specific device they lost. (This is why naming the keys descriptively in Step 2 is so important!)
Conclusion
Transitioning to FIDO2 WebAuthn and hardware keys might feel like an administrative hurdle, but the security benefits are massive. By following these steps and ensuring every admin has a solid backup method registered, you can complete your Salesforce MFA setup smoothly and keep your org’s most sensitive data locked down tight.
Official Salesforce Help & Documentation References
If you need further technical assistance or want to read the official Salesforce documentation on these processes, refer to the following articles on Salesforce Help:
- Register a U2F or WebAuthn Security Key for Identity Verification — The official click-path for setting up physical hardware keys like YubiKeys.
- Register a Built-In Authenticator for Identity Verification — Salesforce’s guide on registering device-bound biometrics like Touch ID, Face ID, or Windows Hello.
- Disconnect a User’s Verification Method — The Admin guide for revoking access when a physical security key is lost or stolen.
- Generate a Temporary Verification Code — The emergency “break-glass” procedure for Admins when a user loses their primary MFA device.
FAQs
Can I still use the Salesforce Authenticator or Google Authenticator app for privileged accounts?
No. Standard TOTP (Time-Based One-Time Password) apps like Google Authenticator, Microsoft Authenticator, and even the Salesforce Authenticator app are not considered “phishing-resistant.” Because the six-digit codes they generate can be intercepted by a sophisticated attacker in real-time, they no longer meet the mandate requirements for users holding permissions like System Administrator or Modify All Data.
What happens if I lose my YubiKey and get locked out of Salesforce?
This is why registering a backup method is critical. If you lose your primary hardware key and have no backup method (like a built-in passkey) registered, you will be locked out. You must contact another active System Administrator in your org. That Admin can go to Setup -> Users, click your profile, and generate a Temporary Verification Code. You can use this code to log in and immediately register a replacement key.
Do I have to buy a physical security key (like a YubiKey) to comply?
Not necessarily! If your company policy allows it, you can use a Built-in Authenticator instead. This means you can use your laptop’s built-in biometric scanner (like Apple Touch ID or Windows Hello) or a cloud-synced passkey provider (like Apple iCloud Keychain or 1Password). However, physical hardware keys remain the highest tier of security because the credential can never leave the physical device.
Can I use the same physical Security Key for both my Production and Sandbox orgs?
Yes. You can register the exact same physical YubiKey or Titan Key across multiple different Salesforce environments (Production, Developer Sandboxes, UAT). You will just need to go through the registration steps in the Advanced User Details menu for each individual org you want to access.